

So, you have joined Huptown XP and want to start creating new experiences.
Here is a guide and some tips to guide you on how to create and manage your events and experiences successfully.
It is important to note that to create a new Event or Experience you must have access to the XP Manager. If you don’t already have access, you should head to the sign-up page at: https://huptown.com/xpadmin/registration registration to create an account.
Once you have signed up; you will have to wait for a little while for our XP support team to review and approve your registration. Once approved and you have access to your XP Manager, you can begin creating events and experiences using the following simple steps.
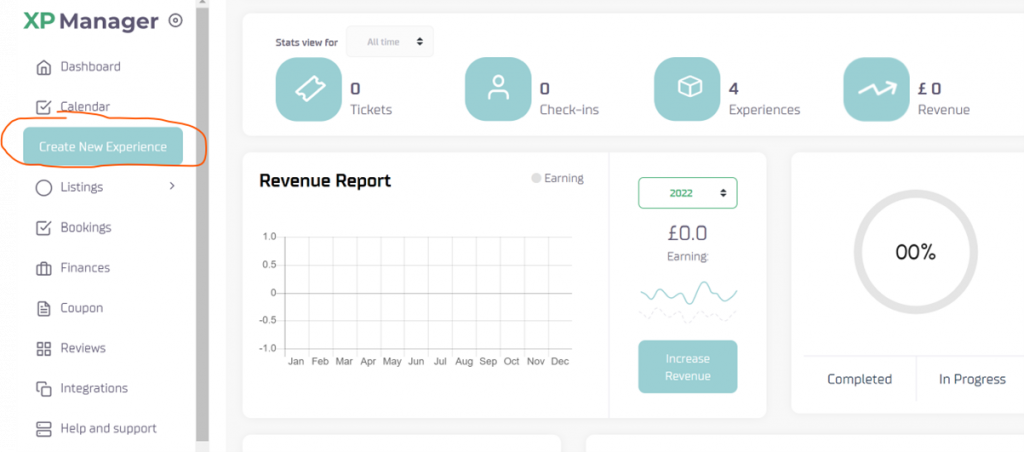
Create New Experience
To create a new experience, click on Create New Experience title on the left side of the dashboard.
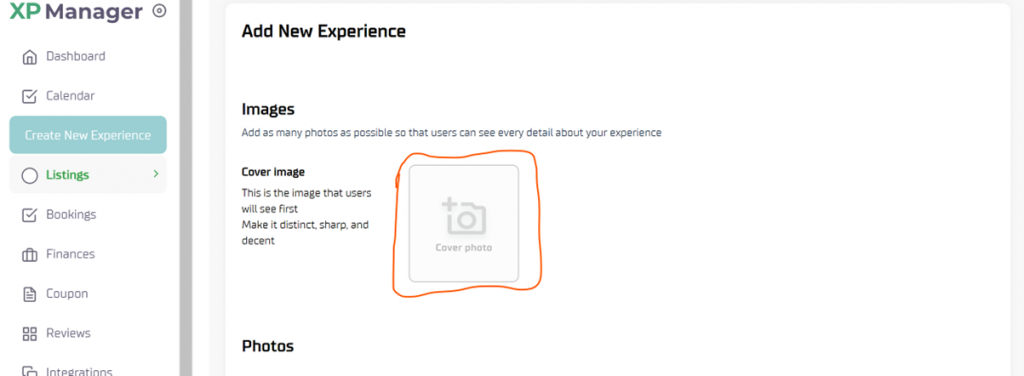
Add a Cover Image
Once you have landed on the create new page, the first step is to upload a cover image for your chosen event or experience; a cover image is mandatory and will be the first selling point of your event that users will see.
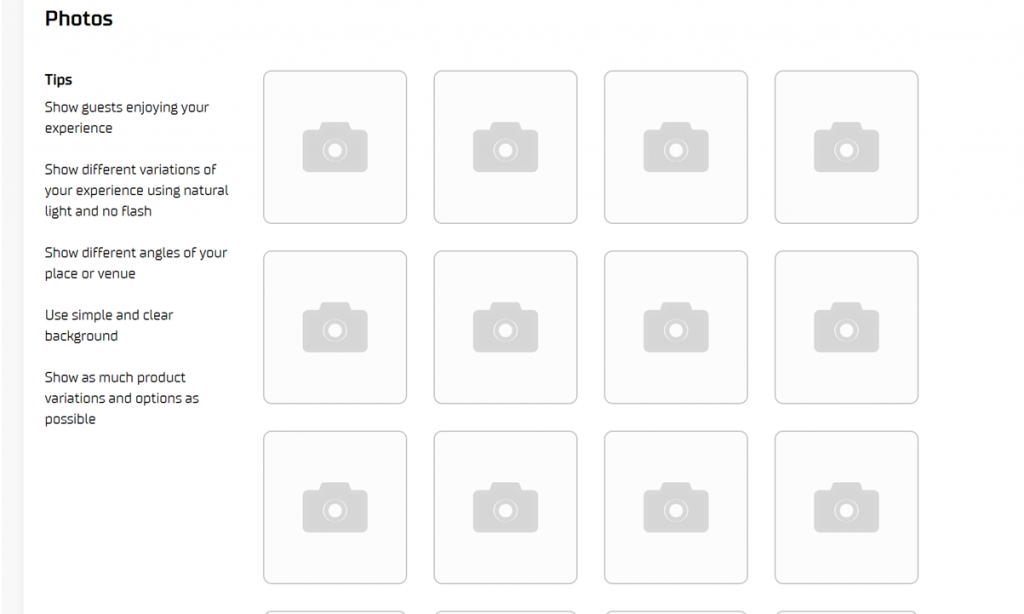
Add Photos
Once you have added a cover image, the next step is to add more supporting images to describe what you offer.
You can add up to 17 supporting images and a minimum of one. Adding no image at all may lead to rejection of your listing.
Create a tittle
Now add a title that you’d like to name your event or experience; for example, “Seafood lunch at H lounge”. Make sure that your tittle is short and apt.

Select a Category
There are multiple categories to choose from during the listing, you should carefully select the most applicable one to what you offer. When you click the category box, a popup will appear which you can use for selecting a category. You should scroll down and click apply once you are done. In some cases, you can choose more than one categories but not more than 2.

Describe your event or experience
What do you offer; this is where to describe it in clear and simple words. You should bear in mind that people barely have to time to read a lot of words, so keep it short and simple but ensure to explain what your event or experience entails.

Highlights
Highlights lets you summarise key aspects of your offering; an example can be: ‘Three-night accommodation in a five-star hotel’, for a company offering a multiday tour. If you have more, you will see another text box by clicking the plus sign below

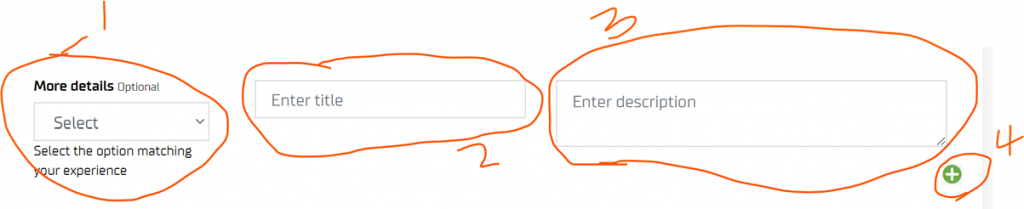
Enter more details
This step is optional and can be skipped but if you have more information to provide to would be guests such as Menu, Itinerary, Programme or just more details about your event, select the drop-down button below (numbered as 1) and choose the option that suits your case the most. After that, enter a tittle into the box (numbered as 2).
If you have selected Menu in the drop down (1) for example, your tittle under (2) can be: Appetizer or whatever you name it. The box (number 3) is for describing what Appetizer options are available according to your menu.
To add more menu details such as First course for example, clicking the + button (number 4) will provide you with another box option where you can enter more information. Enter First course into (number 2) and provide a description of it under (number 3). You can use as much + buttons as needed to explain more menu options.
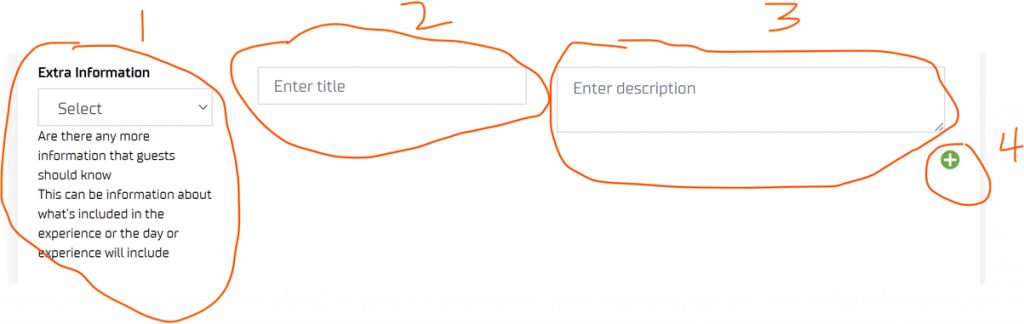
Extra information
The extra information step is optional and can be skipped but it lets you inform potential guests of any information that they should be aware of such as: Parking, policies, restrictions, inclusions, exclusions and so on.
If you offer an event ticket for example, you can select the Information option from the drop-down menu (number1) and use the (number 2) box to create a tittle such as: Entry Notes. You can use (number 3) to enter the description of what Entry Notes mean. To enter more details or information after creating Entry notes for example, Event policy you can use the + button (number 4).
Set up dates, time, and availability
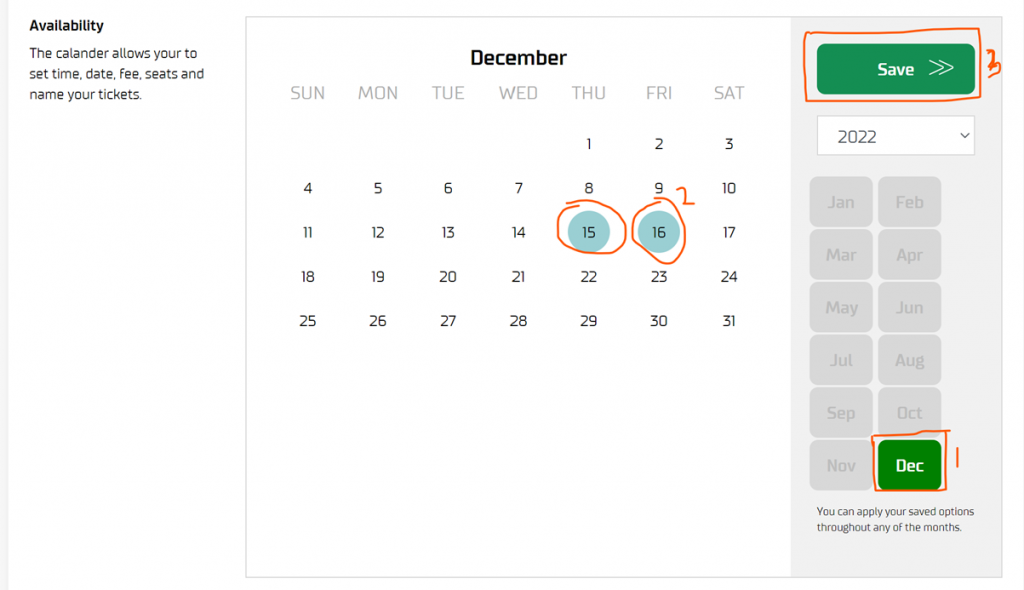
To choose dates for your event or experience, first select year from the drop down and select month.
You cannot select multiple months at the same time for now; to select two months for your offering, (December, and January), for example, you will have to first select December choose your preferred days and click Save before choosing another month.
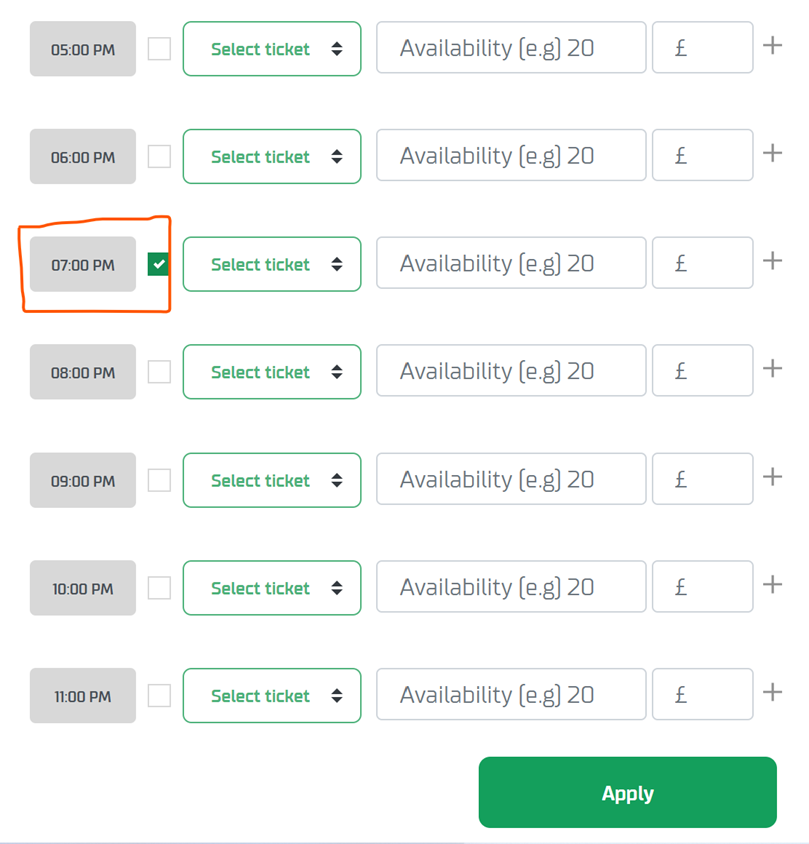
Once you click save, you will be presented with box where you will select your preferred time, inventory, and set your fee.
In the example below, we will choose 7pm as your event or experience time for example. After selecting time, you can choose the drop down to choose ticket type such as Adult or Child.
After that you should enter the number of tickets, seats or space that you have available into (availability), proceed to enter the fee but do not add currency sign into the few box when setting entering amount. Once that is done scroll down and click Apply.
Once you have saved all of your information for the selected month, you can proceed to select another month and repeat the same for subsequent months.
Quick tip: –
- When selecting time, you can select as many time options as possible, but you have to manually enter the price and availability for each time selected. Also, do note that currently, you can only choose time by the hour; we will soon be introducing better time selection features.
- You can create multiple ticket types such as (Child, Adult, Pass, VIP, Entry) and so on for every hour and at different fees, to create extra tickets for example Child after choosing Adult as your initial option. Click the + button on the right hand to enter a different option and fee. In that case, you should note that for now, availability (inventory) will be the same as the parent selection.

Choosing a venue
You can use the address boxes below to provide information about the event venue. This should be the address where the event or experience will take place. If your event has more than one venue, you use the + button to add more address. To reduce chances of error, you should not enter more than three different venues at once.
Tip: You can create an experience from any country.

Duration
Here you can give an estimate of how long your event or experience will take. If it’s a multiday trip or tour for example, the duration can be entered as 3 days or 5 days, etc. If its an event that will last for a few hours, enter the hours here, for example , 5 hours.

Tags:
Tags are used as keywords and will aid in the search and categorisation of your listing, you can add more than one tag by using the + plus to create another one.

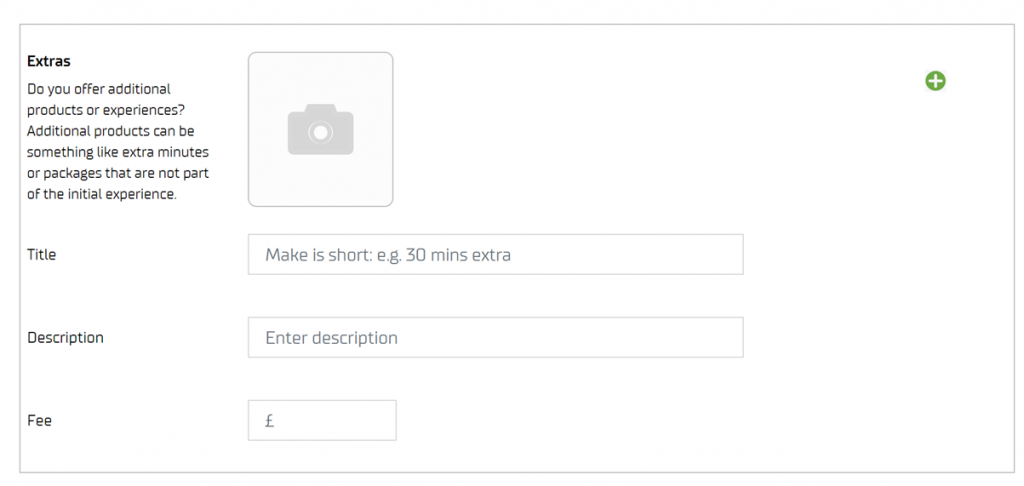
Creating extras
Extras are optional and don’t have to be used when creating a listing, however, it can be a great way of letting guests know of other complementary offerings that you have.
Once you are done setting up your listing, it is usually advisable to review it before clicking submit. If for any reason you are not unable to complete your listing at one go, you can use the save draft button to save and come back to it later.
Once you click submit, your listing will be under Pending in listings, and our team, will approve it as soon as possible.